CURRENTLY SOLD OUT
About this product
Product Identifiers
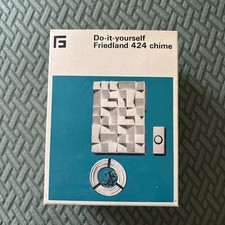
BrandFriedland
MPND792
eBay Product ID (ePID)1737747125
Product Key Features
Power SourceHardwired
Year Manufactured1972
Suitable ForHome, School, Shop
Button MaterialMetal
ConnectivityWired
Button ShapeRound
ShapeRound
ColourBlack
Number of Batteries1
Voltage8V
StyleTraditional
FeaturesPortable Bell/Chime, Melody/Tune
FinishMatt
MaterialCast Iron, Brass, Steel, Plastic
Dimensions
Width3.6 cm
Length7.3 cm
Item Weight200 g
Ratings and reviews
Most relevant reviews
- 31 Aug, 2019
Good functioning door bell
It works very well - good sound & loud enough. Should mention that it does not actually say 'Friedland' on it & is in a package labelled 'Newlec'. Presumably manufactured to Friedland design. Should also mention that due to its design, functions on AC only - ie bell transformer required, Also important to mount it the right way up!Verified purchase: YesCondition: New
- 10 Nov, 2020
Good Basic Bell
A basic wired low voltage bell. Simple and easy to install. Note -requires suitable transformer and bell push for operation (not included). Good sound level.Verified purchase: YesCondition: New
- 08 Aug, 2019
Wiring. Detailed review. Replacing box type.
Bought this a few years ago. The original of same design lasted 18+ years and stopped working as the contacts had tarnished. I have bought another to replace a box shaped bell which only lasted a few years and basically had fell apart internally. This bell is loud and robust. The screws to attach the bell have small heads allowing them to fit inside the holes in the housing. Unfortunately the screws were to narrow for the existing brown 7mm plugs in the ceiling. So I just used some longer and slightly thicker screws. Make sure your wiring does not touch the bell housing as this will affect the sound. I used an existing 8volt 1amp power supply to power the bell. Make sure you screw the dome in straight and not to tight, there should be a nice ting sound when you flick it Wiring: From the transformer, one wire goes the door bell, the return wire from the door bell goes to one contact on the bell. The other wire from the transformer goes directly to the other contact on the bell. If you are replacing a bell box, it might have had separate contacts for each wire (4 wires all together) so in this case one wire from the transformer needs to be connected directly to one wire from the bell. As only 2 contacts are provided. I twisted the 2 together. Its preferable to connect 8v neutral to the door bell and the 8v live directly to the bell. This might be different if you have a lit door bell.Verified purchase: YesCondition: New
- 08 Feb, 2018
Not what I had hoped for
I had wanted a bell to waken the dead but I now realise that they can only be 90db tops, the best thing I can do is make my own pull bell.Verified purchase: YesCondition: New
- 04 Aug, 2016
Replaced two worn out identical bells
We moved house recently and the two old versions of this bell gave a pathetic buzz that we were unable to hear in the next room. Since these were so well reviewed, not expensive and would just fit over the existing wiring, I thought I'd give them a go. Works like a dream - very loud. Can hear at least two floors away in our town house. Recommend.Verified purchase: YesCondition: New
- 03 Apr, 2019
Just as expected
Simple replacement for existing unit, good price as apposed to usual named products.Verified purchase: YesCondition: New
- 01 May, 2017
sound
this ingenious item is an ideal bell offering continuous ring. For best performance place a thin washer inside the dome before reassembly.Verified purchase: YesCondition: New
- 07 Feb, 2018
Dome door bell
Good unit, and works well, just not loud enough for our use, could do with a louder bell! Not easy to judge the size from a photo.Verified purchase: YesCondition: New
- 08 Oct, 2020
Good product
If you would like a bell of traditional sound this is a suitable productVerified purchase: YesCondition: New
- 28 Aug, 2019
Nice looking unobtrusive bell.
Very easy to fix (screws included) and wire up. Loud enough for a normal household and tone is easily adjustable. Would recommend.Verified purchase: YesCondition: New