Tin was as described. Def not repackaged or anything sinister. I'm so glad I snagged it for the price!
0***6 (114)- Feedback left by buyer.
Past year
Verified purchase
Took 2 weeks to ship, but arrived in good condition.
r***o (903)- Feedback left by buyer.
Past year
Verified purchase
Items arrived in excellent condition and were packaged very well. Easy transaction, no issues. Thank you, seller!!
e***k (16)- Feedback left by buyer.
Past 6 months
Verified purchase
Seller took weeks to even make a label for my order and never shipped it.
n***k (13)- Feedback left by buyer.
More than a year ago
Verified purchase
Description was wrong (Blissey instead of Pikachu) as I received the Pikachu tin. I needed both of them anyway so it's not a problem! The tin is indeed sealed and it arrived relatively fast. It was a shallow tin as I ordered, they're pretty hard to find for a good price so I'm happy!
Slight dent at the bottom but overall I'm glad to add this tin to my collection.
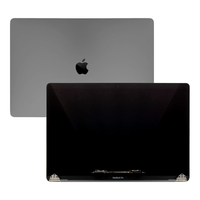
Space Gray MacBook Pro Retina 15" LCD Display Assembly A1707 Touch Bar 2016 2017
01 Apr, 2019
Exactly what it says it is...
Product is exactly what you expect. Looks and feels like a new product. I ordered the "Premium Grade" and it looks like new. Received it 2 days earlier than expected.
Tip:
You will need specialty screwdrivers/bits. Go buy a Hypertough Cellphone repair kit from Walmart (<$15). It has everything you will need to remove the old lid assembly and replace with the new one. Pentalobes for the case and small torx for the interior.
Search youtube for a video on "replacing MacBook Pro A1707 display". Find the one that's about 1 hour, 21 minutes. It will show you exactly how to perform this repair. Ignore the part about repairing the display, all you need is the disassembly/re-assembly portions. Trust me, unless you've done this before, you will miss steps that could damage your computer.
Stick a small screwdriver into the hinge screw holes (new display, don't damage screen!) to open the hinges of the new lid assembly so you can attach it to the bottom keyboard portion of laptop. Just stick it into a hole and push backwards enough to get the bottom in and re-attach screws. Be CAREFUL.
Use small baggies to keep all of the small screw SEPARATE. Use a marker to mark the baggies. You DON'T want to lose those screws and you don't want to forget what goes where.
All in all, I'm happy with this display. If you don't mess up, your laptop will look and feel like new again.